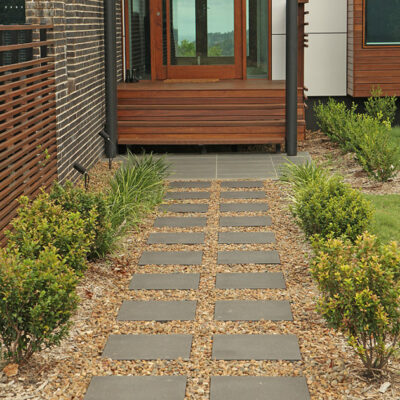
DIY Stepping Stones
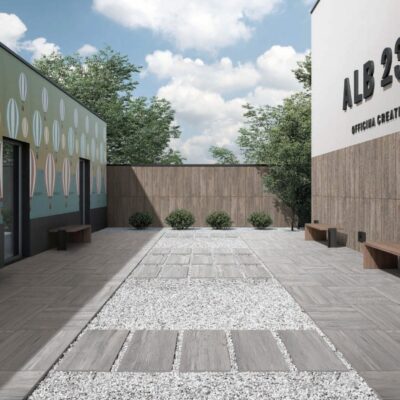
DIY Stepping stones are a unique way of creating a path through your garden. Creating a clear walk way in your garden can help reduce worn areas in your lawn or trampled plants in your garden. They are also a great option for areas where water drainage is required.
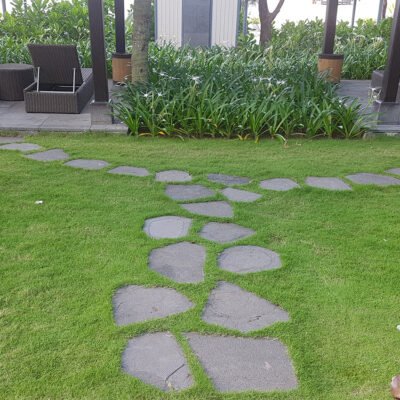
However, you need to consider the application of your DIY stepping stones. For example, step stones in lawn areas may be considered impractical. Thus meaning, you need to mow your lawn so consider how you would do this with stepping stones through your lawn area. In this instance, we would recommend a paved pathway rather than individual stepping stones.
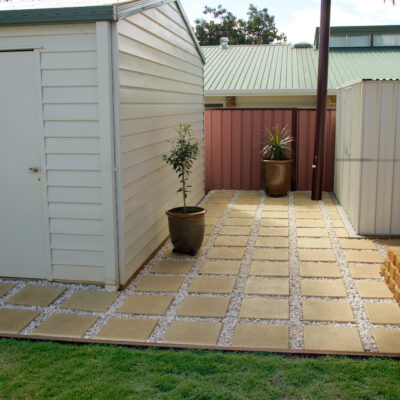
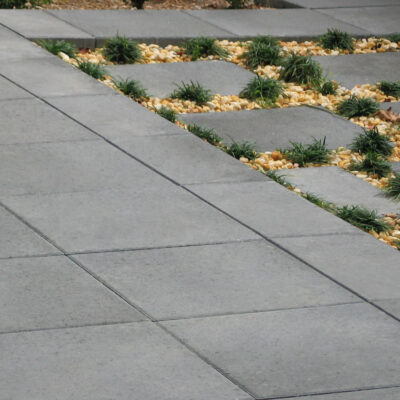
DIY Stepping stones can be great in areas around your house or garden sheds where drainage is required. Therefore, you need to consider if stepping stones are a practical solution. If so, then step stone paths can be relatively easy to install.
Our stepping stone DIY guide is based on laying your pavers on a flexible base without using mortar. We do not include mortar because if the pavers are laid correctly and then backfilled with your stones, they will not move. However, if you ever decide to change the area or adjust the stepping stones around, it is a relatively easy change because the pavers aren’t permanently fixed.
Follow our step by step guide, or you can contact us at APC to obtain a ‘Do It For Me’ supply and install quote.
What you will need
- Step Stones / Pavers
- Gloves
- Spade
- Wheelbarrow
- Steel screed rails / strap
- Pick
- Steel screed bar
- String lines
- String line level
- Steel pins
- Spirit level
- Rubber mallet / hammer
- Straight edge
- Tape measure
- Bedding sand (and road base if req)
- Quarry rubble
Before you start
- Always wear eye protection when cutting pavers
- Wear earmuffs when you are using a compactor or brick saw
- Bend your knees when lifting heavy pavers
- Wear work boots to protect your feet and gloves to protect your hands
- Slip, slop, slap if you are working in the sun and keep your fluids up
Planning
Before beginning, it is important to have a clear plan worked out. The first step is knowing the exact dimensions of the area to be paved. Measure out your area and mark with string or paint. Once you have measured and measured again you can start to draw up your plan.
Excavation
Correct preparation is the most important part of your paving project and if done correctly. This will save you time in the long run and make sure your pavers will look great for years to come.
In most cases it may be necessary to excavate the area to be paved. The depth of this excavation will depend on the thickness of paver you have selected.
Depth of your excavation should be as follows:
(depth of paver) + 30mm for bedding sand + 75mm compacted road base (for walkway).
Once you have worked out the desired finished surface level:
- Drive four stakes into the ground on the corners of the area to be paved and run string lines between them at the finished surface level
- Level the strings using a string line level
- Remove all grass from the area to be paved
- Excavate the ground to the required depth
- The prepared ground must be even
- Compact or replace soft spots in the ground
- Spread and compact road base if paving a driveway area
Rainwater must flow off the finished paving and away from the buildings. The paving must not be perfectly flat but should slope a little (about 15mm per metre).
If the paving is against the side of the house, the pavers must be below the damp proof course. Never cover damp proof courses or air vents.
Check evenness and depth of base by measuring from string line. The finished surface level of pavers may be at or above ground level.
Preparing your base
Your base preparation is a critical step as this will help provide your drainage and allow the water to run away.
Roadbase
The roadbase is imported quarry rubble used to build up areas, set levels and provide a strong, stable layer to support the laid pavers. A 75-80mm thick layer is required for walkways.
Roadbase for walkways may be reduced on sandy or non-reactive sub-grades. However, it does add considerable strength to the pavement and is recommended for a ‘first class’ job. All roadbase material should be compacted with, at least, three passes of a mechanical vibrating plate compactor.
Bedding Sand
The next step is to lay bedding sand evenly over the area to a depth of 30mm. Bedding sand (washed concrete sand) is required under all paving. 1 tonne will cover approximately 20m2.
i.e 20m2 x 0.03 (30mm) depth m + 0.6 cubic m3
0.6m3 x 1.8 = 1.08Tonne

Screeding the bedding sand
A 30mm layer of bedding sand is required as the final preparation for laying pavers. Levels for this base will be reflected in the finish of the paving, so it must be accurate. The most effective method to level the bedding is to use two screeding straps set accurately in the bedding sand to the required levels and placed approximately 1m to 3m apart. Screeding straps are about 100- 125mm in width and 2-3mm in thickness. Length of the straps can vary from 1.5mtrs to 3mtrs long.
The screed rail is then used to level off between the screeding straps. Next, the straps are removed and the sand is smoothed off with a trowel prior to laying the pavers. The bedding sand is not a levelling medium, the thickness must be kept consistent across the paved area to avoid uneven settlement of the paving.
Remember the level of the bedding sand will determine the finished levels of the paving so take your time to get it right and allow for necessary falls.
Dry lay your pavers
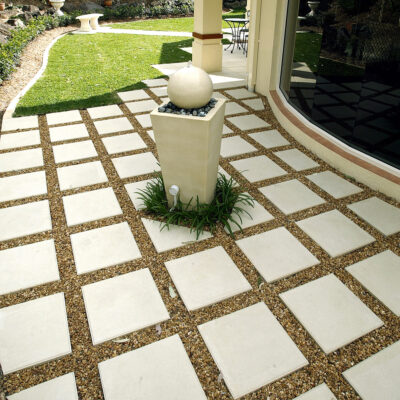
You want to mark out your stepping stone path before installing so it’s a good idea to place your pavers where you want them. To determine the correct distance and placement and not too far apart to make them easy to walk on. We recommend laying your first and last pavers then evenly spacing your remaining pavers in between.
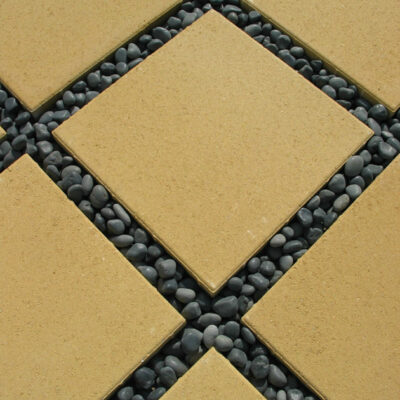
Measure
To get a neat and even finish, measure an equal amount of distance either side of your step stones or pavers.
Create a string line
If your path is in a straight line, at the start of your path, line up a post with the outside edge of your stepping stone and hammer in to the ground. At the other end of the path, insert another post alone the same line and hammer in to the ground. Tie your string to the first post and roll out to the other post and attach, ensure there is tension in the string line. This now provides you with your guide.
Lay your step stones
One by one, place your step stones in place and ensure they are level with your string line, space in between and level with the surface of the ground. Use your spirit level to ensure each step stone is level in all directions and tap step stones into place.
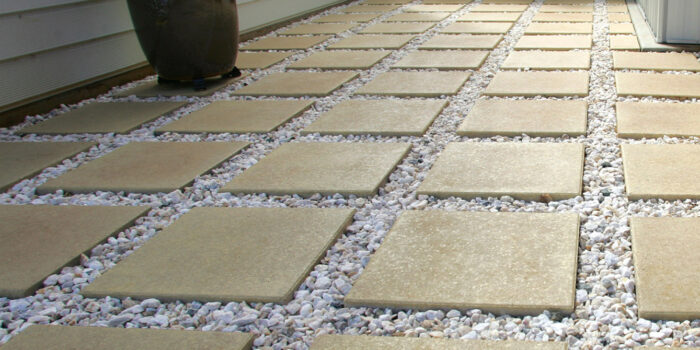
Backfill
Once all your pavers are in place, backfill all around your step stones with your selected stones then hose it all down to clean off any final dirt and settle any dust.
Things to consider
Surface water drainage
Ensure the sub-grade is graded correctly to adequately direct service water away.
Storm water
All pipe work, sumps, grates and inspection points must be back-filled with filling sand and compacted. All storm water installation must comply with minimum depth requirements. Correct storm water installation and back fill reduces the incidence of sinking or rutting over trenches.
You can view our Stepping Stone range of products here.
Visit us at APC to pick up a free sample!
Or, send us a product enquiry or request a quote online